
Everything you need to know to get the strings of your violin to the correct pitch... and keep them there!
In this feature, you'll learn...
First we're going to learn about the pitch frequencies of each string, so we know what to aim for when tuning the violin!
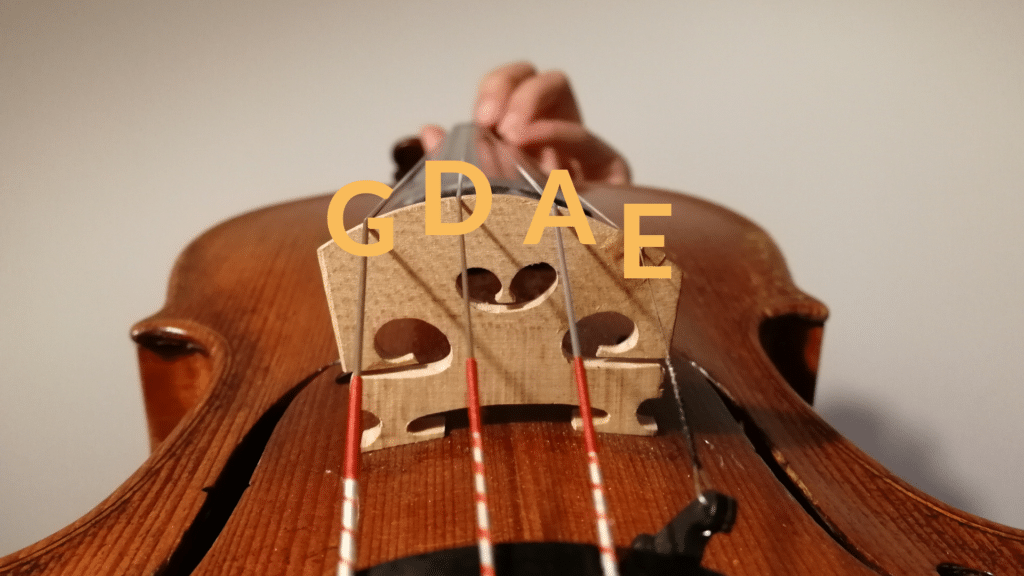
The strings of the violin are tuned to the notes G, D, A and E.
Each of these 'note names' describes a frequency of sound. The exact frequency can vary a bit depending on what style of music you're playing, or where you are in the world!
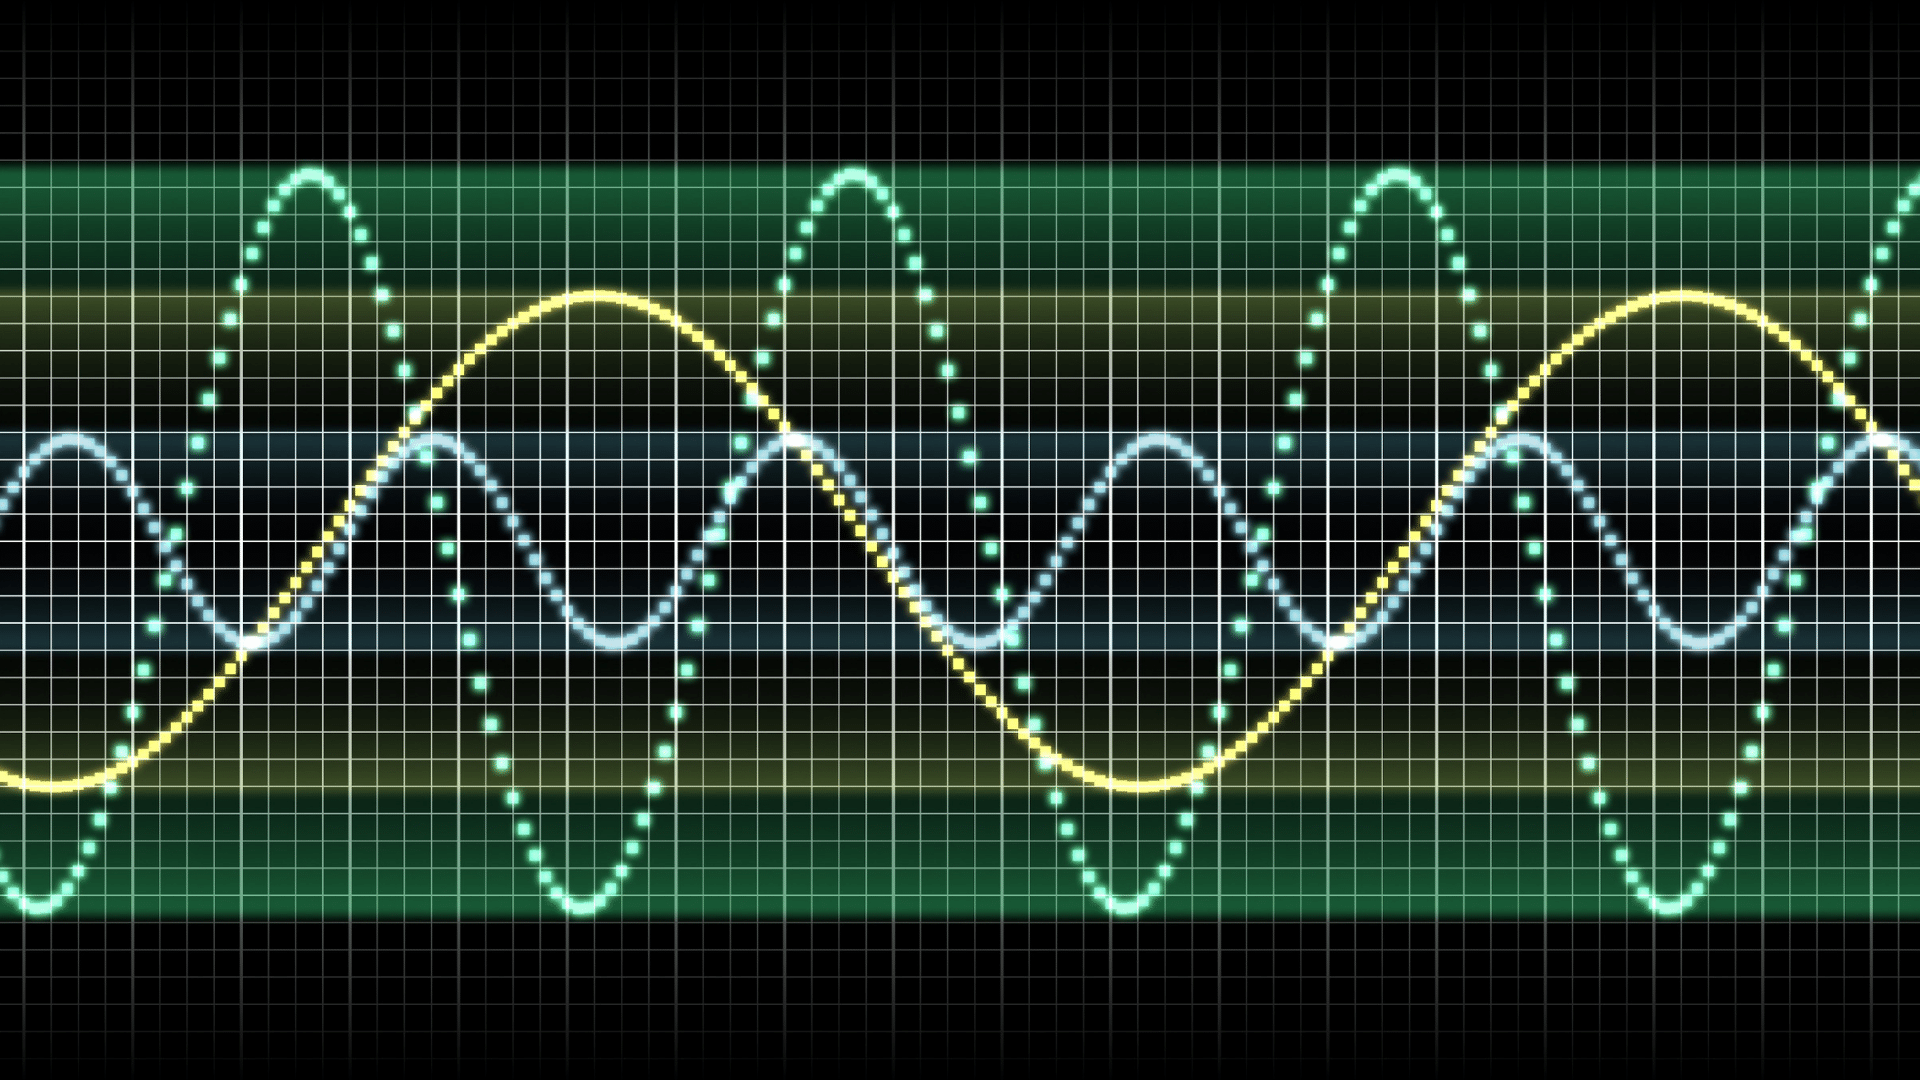
But the most commonly accepted tuning for the note A is 440Hz (Hertz). This is the sound produced by 440 sine waves per second. It sounds like this:
This frequency was decided on by the International Standards Organisation in the 1970s. Since then, the tuning of each string has been measured on the assumption that the frequency of A is 'fixed' at 440 sine waves per second.
Although there's a big debate amongst some musicians about whether this is correct (at our London School for example, we generally use A = 441Hz), we're going to assume that you just want to get your violin in tune as fast as possible... so we're going to stick with the A = 440Hz standard for now!
From A, we can work out the frequency of all the other strings. Each violin string is different to the next by an interval of a perfect fifth. This basically means that each string is five notes of the scale away from the next one.
SIDE NOTE: Tuning is actually a bit more complicated than that... a 'perfect fifth' actually describes two notes which have a ratio of 3:2 between their frequencies... if you want to know more about this, look up 'perfect fifth' and 'A440' on Wikipedia, or consult the ViolinSchool Glossary!
So, here are the other strings:
The G string is tuned to the frequency of 196 Hertz:
The D string is tuned to the frequency of 293 Hertz:
The A string, as we've already discussed, is tuned to 440Hz:
And the E string is tuned to 659Hz:
Before we get into the physical 'how-to' of tuning the violin, let's get clear on what we actually want to achieve.
To tune a violin accurately, you need to be sure that you're aiming for the correct right pitch in the first place. So it's a good idea to have a sound that you can 'refer' to. Let's call this a 'reference pitch'.
Your reference pitch will usually be A. This is because the 'international standard' has led to musicians all over the world tuning the A first, to be sure that it fits the fixed standard of 440Hz.
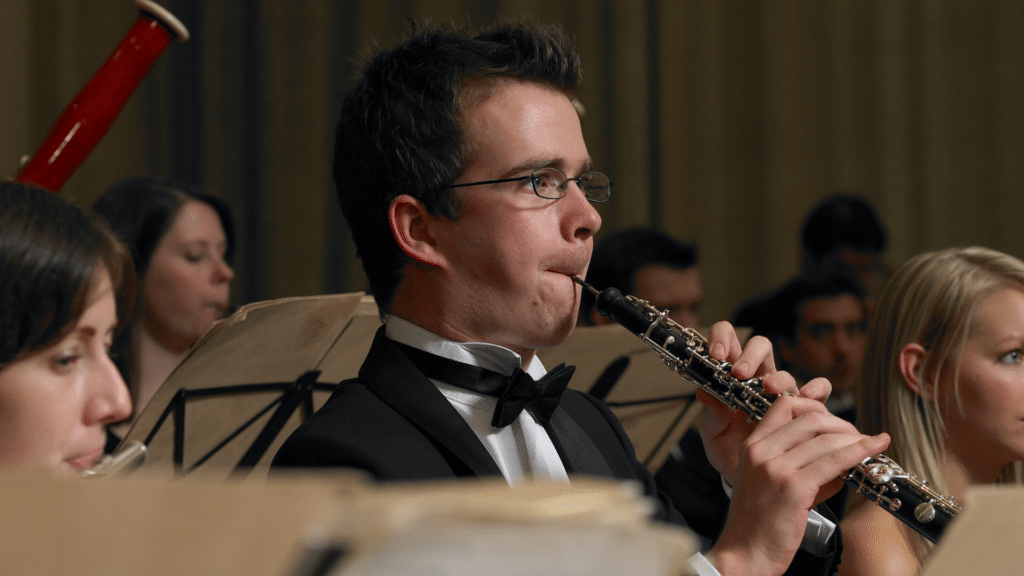
This is why you will usually hear a symphony orchestra tuning to an 'A' played by the lead oboe player. It's also why violinists will often start by tuning the A string, before they tune the other strings of the violin.
Thanks to modern technology, it's now easier than ever to find an accurate sound source to give you an 'A' you can tune to:
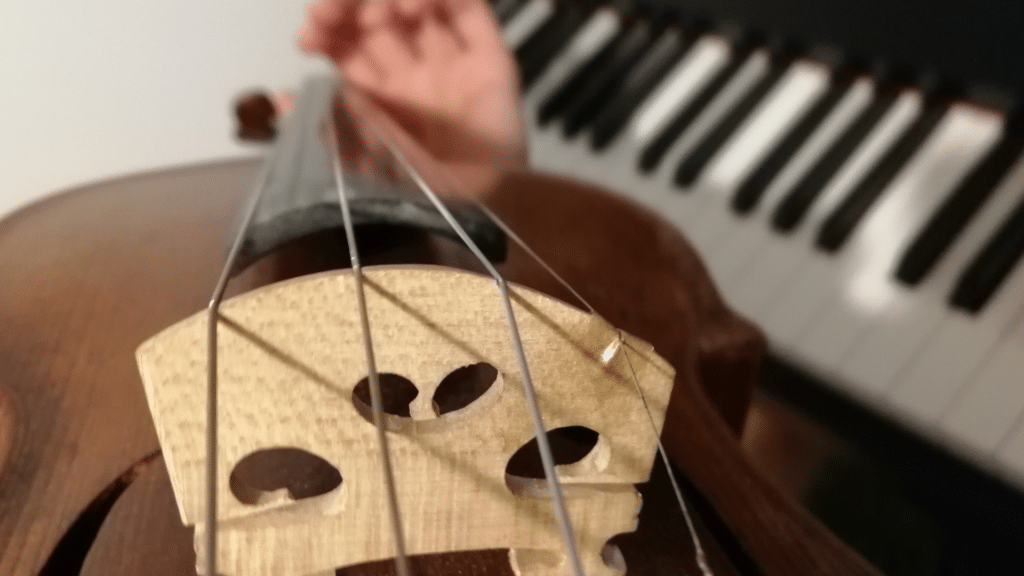
Piano or Keyboard
If you're fortunate enough to have access to a keyboard or a piano, then you can play the 'A' and tune to that. Listen carefully to the sound before you play it on the violin.
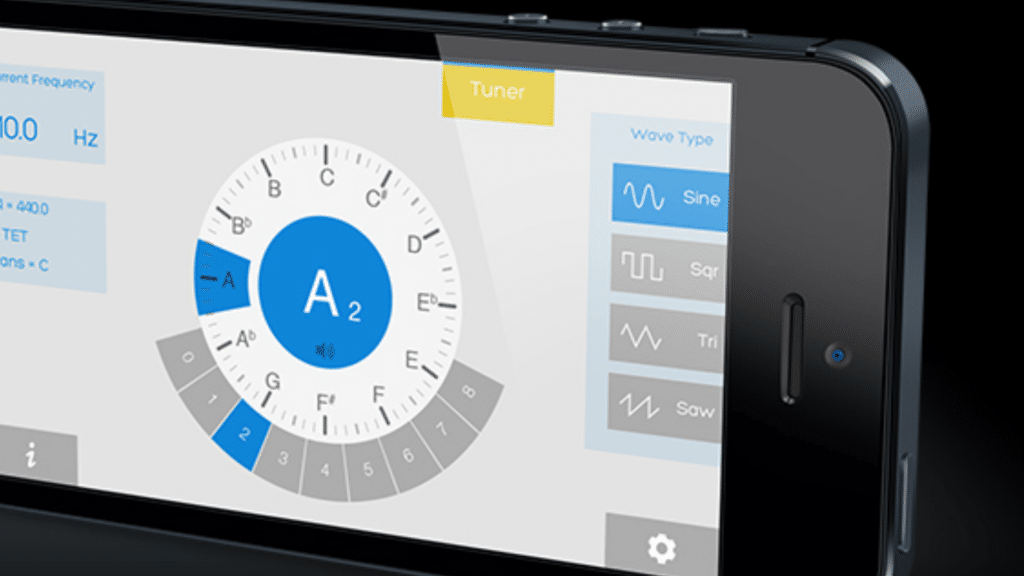
Digital Pitch App
A smartphone app is a great way of getting a clear 'reference pitch'. You can set the pitch you want, listen to it, and get feedback from the app about whether or not you've hit the right note. Just don't become dependent on it!
Online Tone Generator
If you don't have access to a smartphone, then you can use an online tone generator - like the ones at the top of this page - instead.
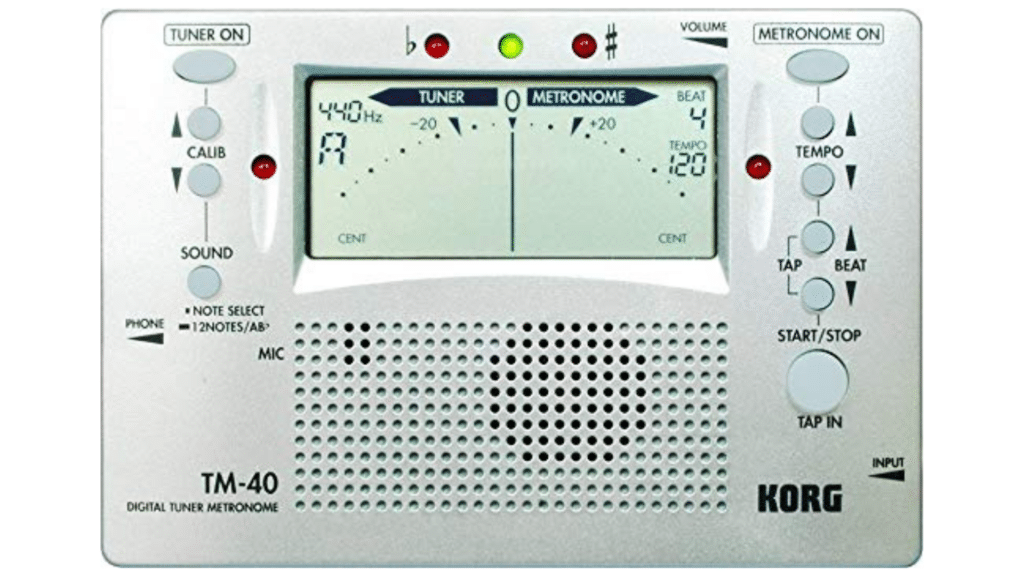
Offline Tone Generator (e.g. on a Metronome or Tuner)
Digital tuners pre-date smartphone apps, and are widely available from music retail stores. Be sure to check the accuracy level of the display, as some tuners measure pitch in more detail than others!
Some metronomes also have a pitch function built in, which allows them to generate the sound of an 'A'. But unlike an app, where you'll often be able to change the pitch of A, a piece of hardware like a metronome with an extra tuning function can often be fixed at 440Hz.
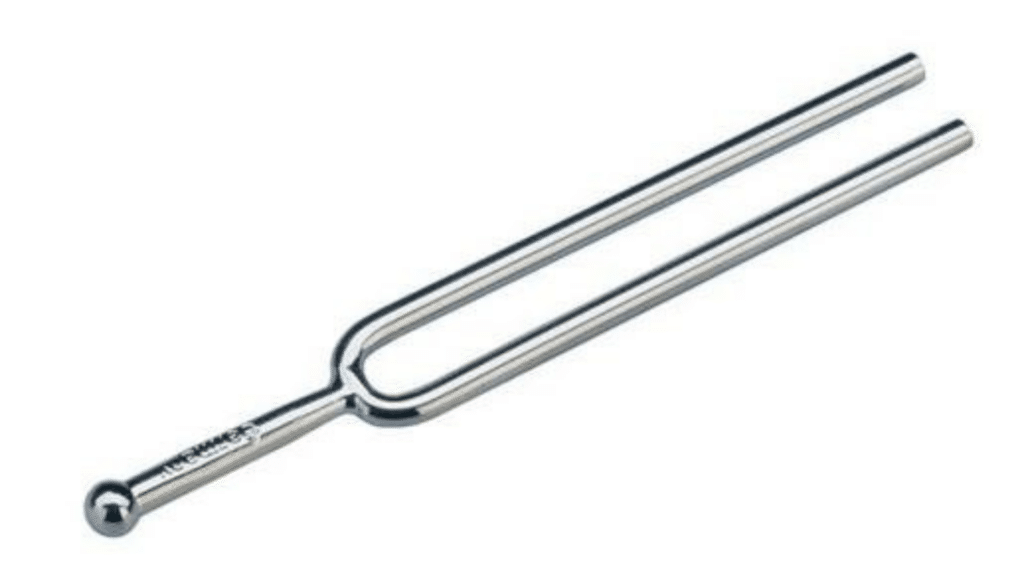
Tuning Fork
A tuning fork is a two-pronged piece of metal (usually steel) that resonates to produce a pre-determined pitch (most commonly A 440Hz) when you hit it against something!
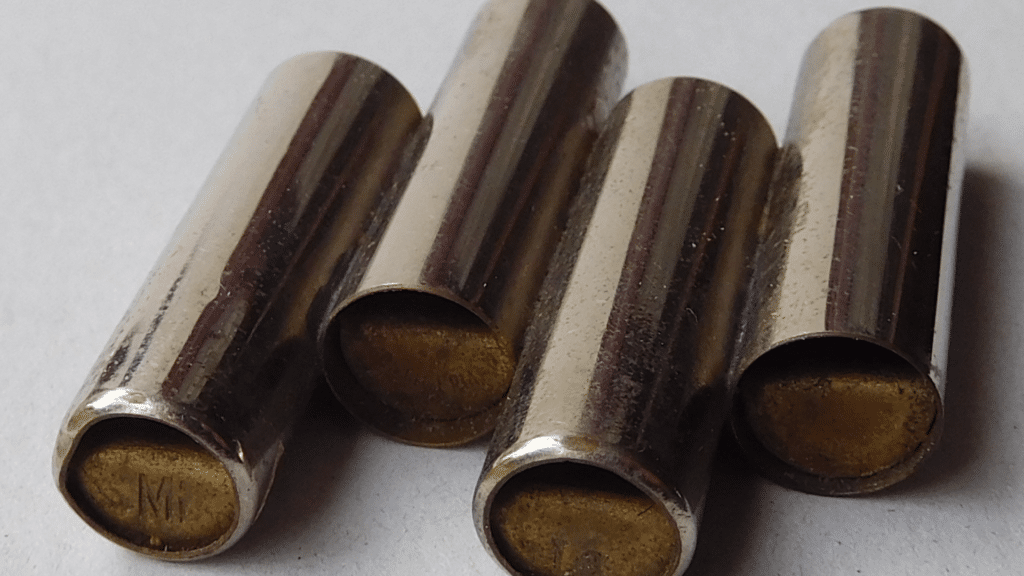
Pitch Pipes
Pitch pipes are small tubes that you can blow in order to produce a sound. Each pipes will be fixed to a pre-determined frequency, so they will always produce the same note.
SIDE NOTE: When tuning the violin, it's really important that you allow the string to vibrate clearly, otherwise you might not hear the pitch accurately. So try not to 'pick' at the strings with the bow… instead, play long, resonant strokes and use the whole bow.
Once you have plenty of experience, it is possible to tune a violin by plucking the strings. But it's still easier to hear the pitch if you play the strings using the bow!
If you’re a beginner or if you don’t have much experience with music, your listening might not be ‘attuned’ to the subtle differences in pitch. This will happen over time.
But whilst your pitch awareness is developing, it’s a good idea to use a visual reference as well as an aural reference. This will give you confidence and certainty about being 'in tune'.
Nowadays, a visual reference can usually take the form of a pitch app such as InsTuner on iOS, or Cleartune on Android. Beware of tuners and apps that aren’t very accurate though, and don’t just follow the traffic light system - look at the dial to see how far you are away from your target pitch.

A useful approach is to use pitch apps to check the pitch only once you have already made the adjustments by ear! Then you're training your ear by making the aural adjustment first... and the visual reference serves as a confirmation (or not!) of what you've already done.
Over time, the more experienced you become at tuning using aural references, the less you'll need to refer to the visuals. Eventually you may not need to refer to a tuner at all!
We change the tension - and therefore the pitch - of the strings, by turning either the Pegs or the Fine Tuners.
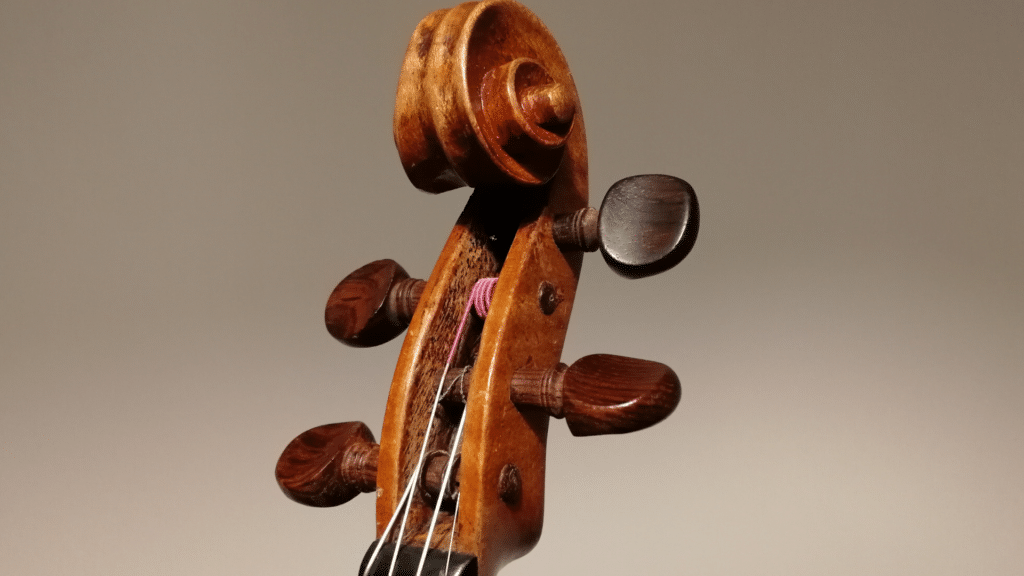
The pegs are the four wooden pins that sit in the pegbox of the violin, just underneath the scroll. Each peg has a small hole in the side of it, just big enough for the string to thread through.
This allows the string to be secured inside the peg, so that it can be wound and unwound safely and securely.

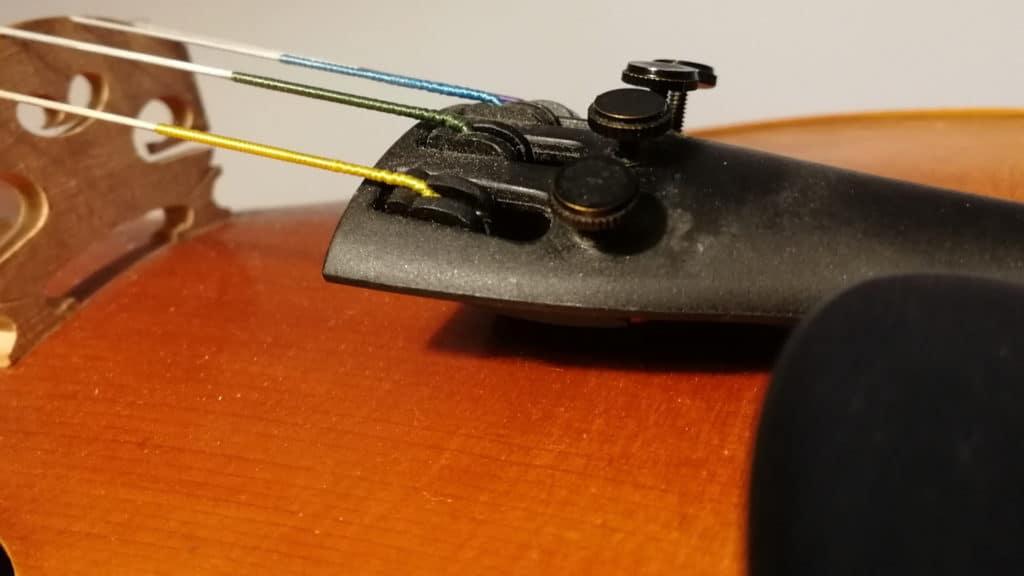
The fine tuners are four small metal screws which are mounted near the top of the tailpiece of the instrument. They work by bringing the metal attachments closer together when screwed.
The bottom end of each string is pulled further towards the violinist (and away from the pegs). This:
As a general rule:
If your violin is very out of tune, or if you've just changed a string and need to make a big adjustment to the string tension, then start by using the pegs.
WARNING! Whatever you do, don’t turn the pegs too quickly or too far ... otherwise the string might snap!
Also, do NOT try and turn the peg away from you without first releasing it towards you!
Although it can sometimes work to turn the peg away from you straight away, this should only be done if:
a) you're very experienced, and
b) you've already tuned the violin you're working with by turning the pegs (so that you can feel how the string responds)
The first time you pick up a violin you should quite simply NEVER turn the peg away from you without releasing it towards you first.
Otherwise you are very likely to overturn the peg, creating too much tension. If you do this, it will snap!
Turning the Pegs
Pegs can often be tough to turn, especially if the violin you're using hasn't been used for a while (or hasn't been 'set up' by a specialist violin shop). This is because of the friction between the peg and the peg box.
STEP 1: RELEASE PEG TOWARDS YOU (Release the String Tension)
Get into playing position, and be ready to play (you'll need to bow the string to hear the changes in pitch).
Hold the scroll or pegbox of the violin with your left hand, to provide support and leverage, and then extend your fingers/thumb towards the peg you'd like to turn.
Gently turn the peg towards you. Be careful in case it is extra-slippery or extra-hard. Use the other fingers and the hand to stabilise your movements.
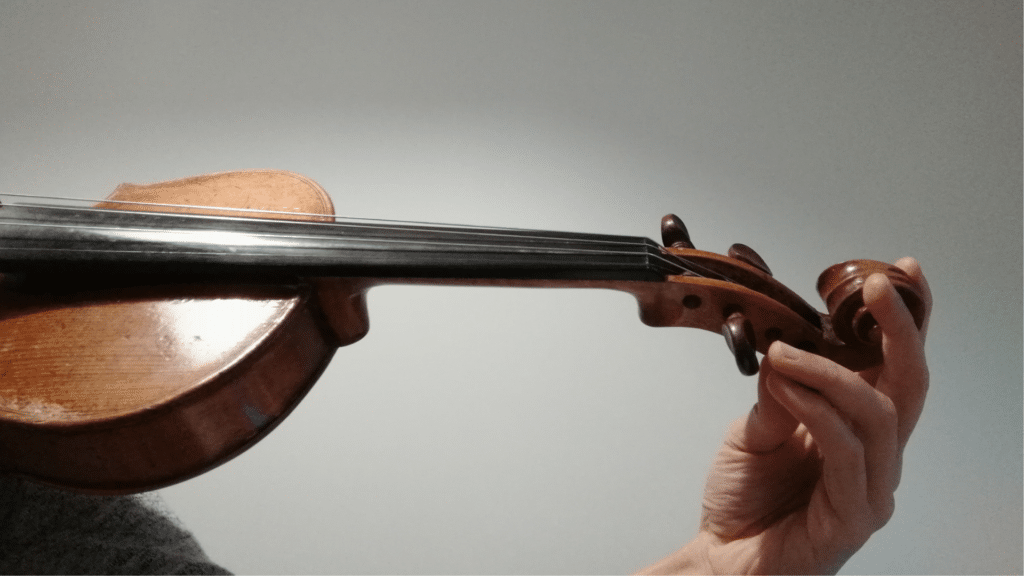
Keep playing the string whilst you turn, so that you can hear the sound of the pitch changing.
Don't turn too far! Only turn enough that the pitch of the string is a note or two lower than the target pitch. Then it's time to wind it up again..
STEP 2: WIND PEG AWAY FROM YOU (Increase the String Tension)
Adjust your hand position so that you are ready to 'lever' the peg back to the right position. This usually requires your thumb to be underneath the peg, so that you are applying force to the underside of the peg.
Awkward-to-turn Pegs
If the peg has got into a near-vertical position, this can be very tricky... if you find you can't do it because you can't apply enough force at that angle, then try sitting down, placing the violin upright on your leg, holding the scroll in one hand, and turning the peg with the other.

Using pegs when the strings are very 'out of tune'
If all four strings of the violin are quite far from their correct pitches, then don’t try and get each string perfect the first time you turn the pegs. This is because if you turn the peg for one string quite a long way, then it will affect the intonation of the other strings.
Instead, go around all the strings couple of times, using the pegs to get each string to approximately the right pitch. By the time you’ve done this twice, or even three times, your movements will be smaller, and tuning one string will no longer affect the other strings.
Tuning only with pegs…
If you do not have fine tuners on your violin, then you will need to achieve an extremely high level of accuracy when tuning with the pegs.
But this can rarely be achieved by making smaller movements, unless the pegs are extremely smooth (or you have geared pegs, a relatively new invention that makes tuning with the pegs very easy!).
Therefore, you may find yourself needing to release and re-wind the tension of a string several times, making the string flatter, and then bringing it up again sharper.
Essentially you are synchronising your listening with the subtleties of the pegs and strings of the violin that you're currently tuning.
By listening to the change in the pitch the first few times you use a peg to change a string's tension, you are 'acclimatising' your ear so that you know how that peg and string behaves.
This is why you will sometimes hear a violinist releasing the peg and then tightening it several times. Essentially they are getting used to how the peg / string behaves on that violin right then and there.
Once you're used to this, you can adjust the speed and distance of your tuning movement to increase the accuracy of your 'big' peg-winding movements. Then you can land on precisely the note you want.
Only Pegs? Or Do I Need Fine Tuners Too?
Fine tuners were invented to make tuning a violin easier, but not every instrument comes with them fitted. However, they do make tuning significantly easier!
For first-time beginners, we do recommend getting fine tuners (or geared pegs) fitted if your violin does not already have them, because it is so much easier to tune the violin that way!
WHY do some violins have a fine tuner only on the E String?
It's really hard to use a peg to tune the E string! Small adjustments are particularly difficult, because the string is so thin and wiry, and therefore more difficult to handle.
E Strings are also much more prone to snapping than other strings, because they are thinner and therefore do not handle changes in tension so well. Using a peg to tune an E string only makes this problem worse!
That is why a fine tuner is usually fitted to nearly all E strings, whereas it’s just not as necessary for the other strings.
Fine tuners are good for making small changes to the pitch of the strings.
As a general rule, changes of approximately one note (i.e. a semitone , or a ‘half step’) are more easily handled with the fine tuners than with the pegs.
Anything larger than that will require so much turning, that it will take the fine tuner significantly out of line from the other fine tuners.
For this reason, it's a good idea to learn how to use the pegs so that you can handle big string adjustments, and then use the fine tuners to finish the job!
Which way do I turn the Fine Tuners?
If you're having trouble remembering which way to turn, then drill this into your head...
Turn it LEFT to make it LOOSE!
Turn it RIGHT to make it TIGHT!
Sticky/Squeaky Pegs:
If the peg is 'sticky' i.e. it's hard to turn (or squeaky... or even won't turn at all!), then you can take the peg out, and rub some peg paste onto the pin at the point where it touches the hole in the side of the pegbox.
If you don't have peg paste to hand, then you can also use dry soap, or the lead of a pencil!
Tight or Blocked Fine Tuners:
If you have been using the fine tuners a lot, they will sometimes go all the way in to the end of the screw. When this happens, you won’t be able to turn them any more, because they’re as far in as they can go.
The reason we tend to turn the fine tuners more often to the right than to the left, is because more often than not the violin strings will go flatter in pitch, because the tension in the strings will reduce.
When this happens, you need to unwind all the fine tuners to a position where you’ll be able to use them again, and make adjustments with the pegs to bring the strings back to approximately the right pitch.
Loose Fine Tuners:
If a fine tuner is loose, it needs to be turned a bit further in a clockwise direction, to go back into its screw.
However, this will probably make the string too sharp, so be prepared to make some adjustments from the pegs as well, to compensate for the change.
If that doesn't solve the problem, the screw is likely to be broken, and the fine tuner will need to be replaced.
Temperature Changes:
Extremes of temperature can affect the physical state of the violin's strings, which leads to changes in the string tension.
For this reason, you may find that your violin goes out of tune when you take it between different places where there are different extremes of temperature (such as a warm home to a warm teaching studio via a cold subway train!).
If this happens, expect to need to use the pegs!
Any Questions?
If you have any questions about tuning, just leave a comment below and our Learning Support team will answer you as soon as we can!
Next Steps For Learning:
This feature is part of our free online course called ‘Get Set Up’, which explains all the most important information about violins, bows and accessories. Click here to explore the rest of this free online course!
Please visit our sponsors:
London String School - Tuition for Adult Learners in London
MusicLand - Creative Music Products for Teachers and Learners
Please visit our sponsors:
FiddlerShop.com - Quality instruments at an affordable price
London String School - Tuition for Adult Learners in London
MusicLand - Creative Music Products for Teachers and Learners
